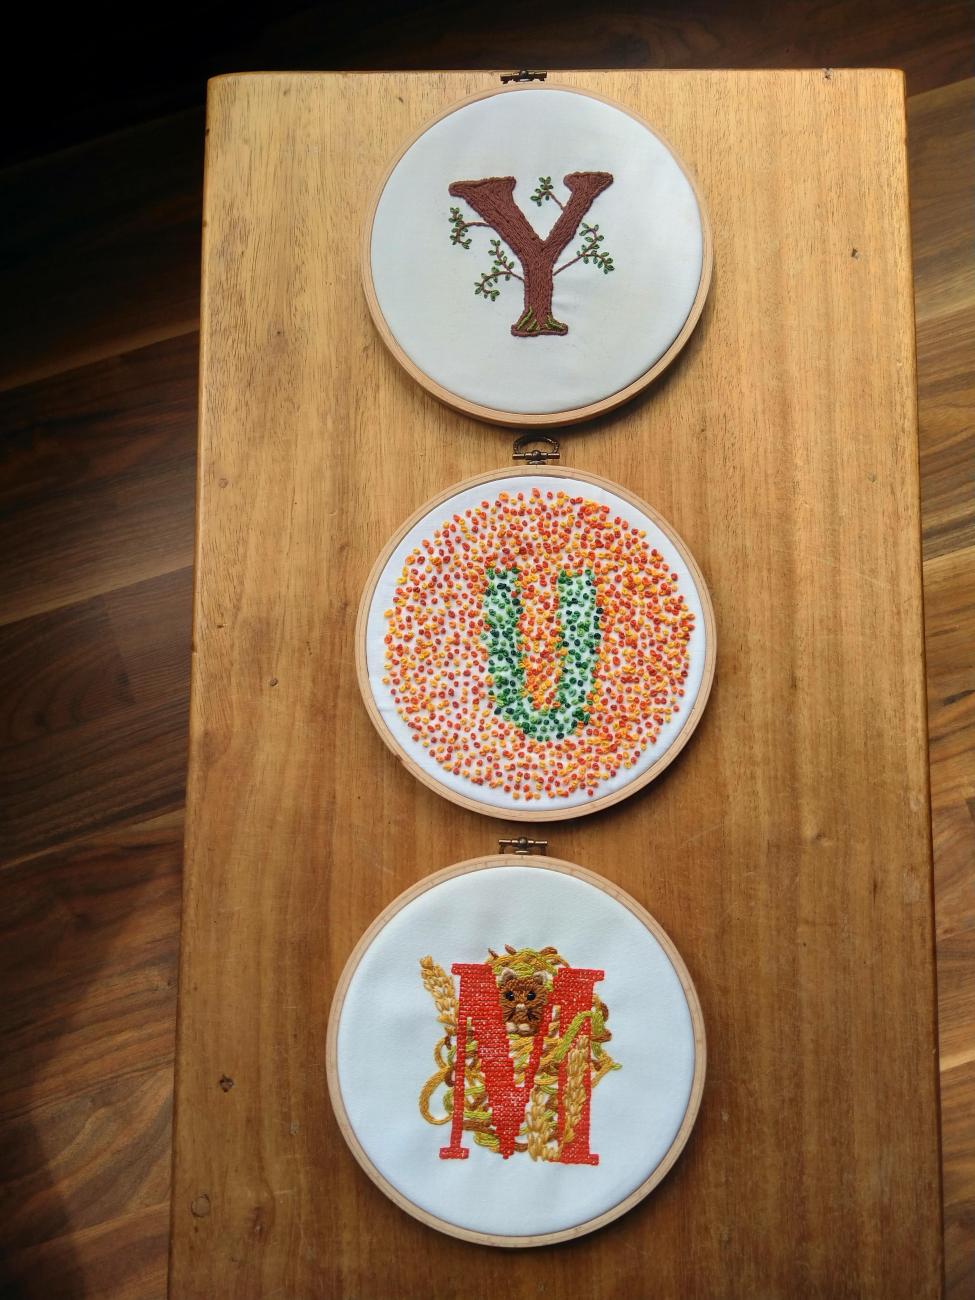
This is a set of three 6" hoops. With the Y I had planned to make the whole letter and surrounding as in the original but since I didn’t know how to use tracing paper, I tried tacking the paper to the cloth to create the outlines. This made a mess of the stitches when I pulled it off and tugged at the cloth, leaving marks. So, I used the stitches to guide a thread which I then completely overlayed (couched style) with more thread, so that everything looked tidy. I then had the outline of the Y. Some of the surroundings were still messy, so I added some “branches” in stem stitch to try to conceal them.
The U was much easier. I'd seen colour-blindness tests so I was able to find some to give me a rough idea of what to do. By this time I knew that it was not a good idea to try to sew on my thick tracing paper. I therefore just held it over the cloth and tried creating some knots under it to create enough dots for a guide to me to complete without the paper. That worked OK since it was a very simple design and not supposed to have precise lines. This taught me how to do French knots and I was happy with the finished design.
I started the M, which came in a kit from the same series as my earlier B, but I wasn’t happy with outlining a red letter in black backstitch as I felt that would make the letter even more prominent, so I used a red outline. I filled in the mouse but then decided the original’s mouse looked more like a small bear. So, I looked at photos of harvest mice and decided to use the kit’s “dark gold” to colour the mouse and avoid bands of colour which harvest mice don’t have. I also decided to make the eyes black and large instead of small panda-style ones (again, to be more realistic). I added a “glint” of white thread on them.
Having finished the M, I realised that Y looked very bare, so I filled in the Y with rows of stem stitch (having learned from the M that this massed effect worked) to create a trunk. Unfortunately the fabric was weak so I could feel a hole developing in the lower right corner of the base of the Y. Luckily I was able to sew over/past it by being careful and so it’s not visible. Have learned from the M that lazy daisy stitches are not hard, I added leaves to the branches.
So, I learned a lot creating a YUM for our kitchen wall.